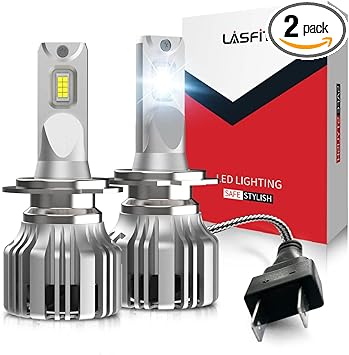
Ok, for the benefit of my fellow Kona drivers in Oz and anywhere else, here is how I updated the low beam headlights to LED. Note that both Low and High beam use the same H7 globe so the same process should work for high beam. I have only done low beam as I don't travel out of town very much.
1. If you are in Australia first open a Shopmate account with Australia Post. There is no charge to open this account and it will enable you to order anything you want online from USA even if the seller doesn't offer International shipping.
ShopMate
2. Go to
Amazon.com and order the Lasfit Pro-HK6 custom fit LED globes (see attached images) - these LEDs include a custom collar that fits perfectly into the Kona headlight housing. They are also Canbus compatible, so will not false trigger electrical warnings.
Amazon.com: LASFIT Custom H7 LED Headlight Bulbs for 2014-2020 Kia Sorento 2018-2020 Hyundai Kona Optima Sorento Hyundai Veloster Plug and Play(2pcs): Automotive
3. When your lights arrive follow the instructions to install.
Tips :
- Before starting, point your existing headlights at a wall and note the beam pattern. Put two pieces of masking tape on the wall to mark where the cut-off point is. This should look identical on the new LED bulbs once they are installed
- On the Kona there is a small access panel on each front wheel arch that provides easy (relative) access to the back of each light housing. Locate these and just pop out the plastic retainer at the top of each panel, squeeze the LH and RH clips to release and the panel drops down to reveal the dust covers for each light.
- The dust covers are removed by rotating 1/4 turn counter-clockwise
- The factory bulbs are removed by rotating counter clockwise
- The Lasfit globe can spin inside its collar to allow for beam adjustment. It can rotate almost 360 degrees but stops at one "index" position. You will need to turn it clockwise until it stops spinning and then you will be able to lock the collar into position in the headlamp housing. Note that one of the locator tabs is wider than the other two so make sure you align this with the correct slot in the housing. Once locked in place you can connect the power wire spade connectors into the original fitting.
- The bulbs must be connected in the right polarity. If you look carefully you will see + and - marked on the plug. The positive wire on the Kona wiring harness has a stripe on it. Test that the light illuminates by turn turning on the headlights before proceeding. If it doesn't light up then reverse the plug.
- While the lights are turned on, point the car at the wall you marked with masking tape and spin each bulb in its housing until you get the right pattern on the wall. For correct beam pattern I found that the LED chips should be vertical, with the power lead at the bottom of the housing. You shouldn't need to adjust the beam height but if you do there are two Philips screw on top of each housing to do this.
4. You should now have beautiful white light coming from both headlamps. But there is one problem.... you won't be able to replace the dust covers as there is not enough space to fit both the old lamp holder and the new LED plug under the dust cover. You have a choice. Either don't replace the dust covers (not recommended, especially if you drive on unsealed roads)
or visit your nearest friendly auto electrician. My electrician cut off the old lamp holder and replaced with two female spade connectors. Then the dust covers fit on easily. So that I could always go back to the old halogen lamps, he also fitted two male spade connectors to the removed lamp holders. To reverse the upgrade I simply remove the LED bulbs and plug the old holder and lamp into the female connectors. My electrician charged me $30 to do this work, which I consider to be very reasonable !
I hope this information is of use to other Kona owners, who wish to upgrade to LED. I must say the difference is well worth the cost !
Happy Kona-ing !
Mark.
View attachment 3640
View attachment 3641
 Just wondering if anyone has tried these or knows anything about them. I want to make sure they are good and will work before purchasing. Any replies are appreciated. Thanks


